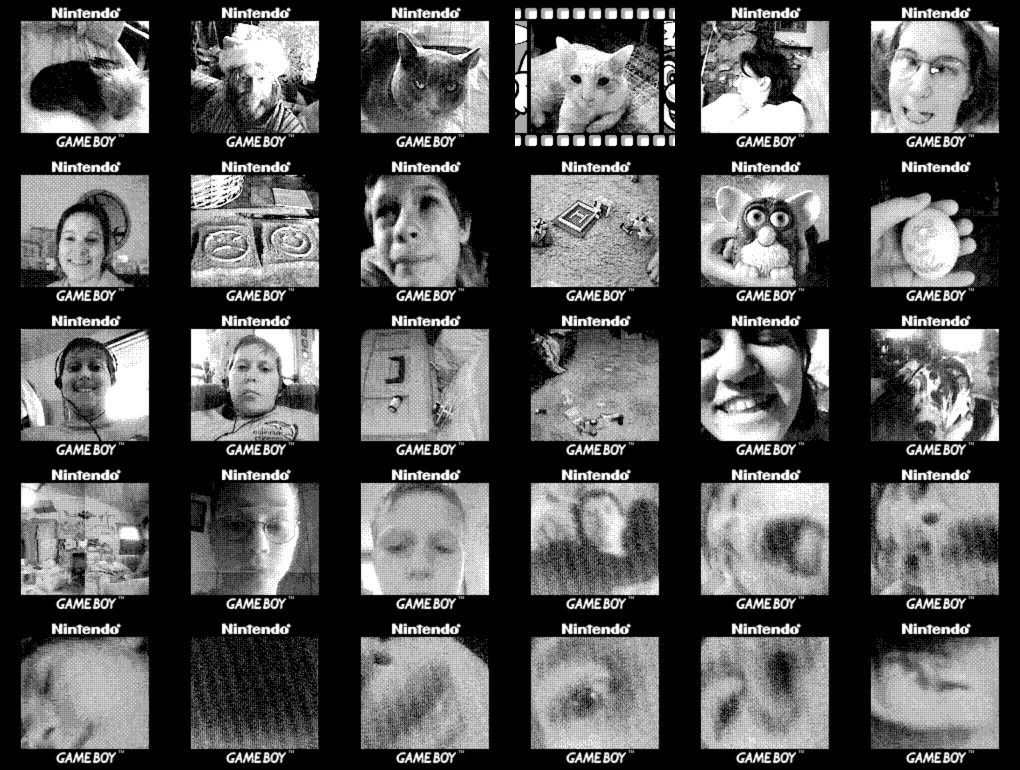
Game Boy Camera Adventures
Have you ever embarked on a project, fully prepared to dig deep and do the dirty work required to get past any obstacle, only to find that almost every problem you face has already been solved by others? In a way, it's a relief, but also some disappointment arises from missing out on the fight, the slog, the joy of understanding and overcoming myself.
Of course, nothing stops me from researching and implementing my own solutions anyway. But working up the motivation is that much harder.
Anyway, that happened with my Game Boy Camera Adventure. I did get to learn, but most of the heavy lifting was already done for me and probably more competently than I could manage. As such, this post isn't a how-to, but more a collection of resources and a re-tracing of my steps. If you've somehow ended up here and you're feeling lost about the process, however, you might find some guidance in the Recovery section below.
Discovery
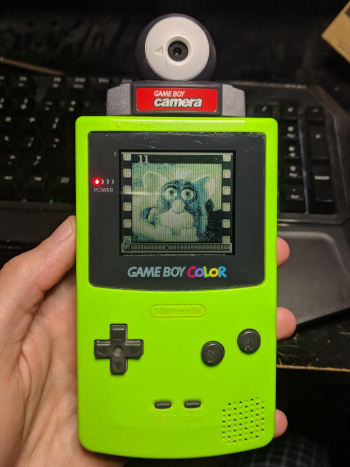
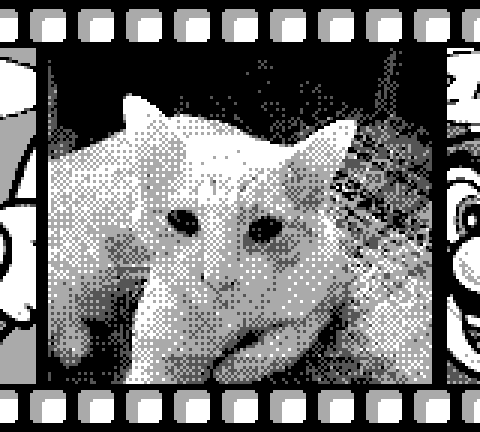
I was searching for some other Thing in my Bins of Various Crap when I stumbled across my old Game Boy Color with the only two carts I had left for it: Kirby's Dreamland 2 and a Game Boy Camera. I flipped it on with the Camera inserted and, as my amazement at the longevity of two ancient AA's wiped away any hope of finding the Thing I was originally looking for, began flipping through these low-res images from my life circa 1998. Several, I'm pretty sure, were from the very Christmas when I received the Camera at 11 years old.
Though I'd never really forgotten that I had my old Game Boy Camera, nor the pictures stored on it, I realized suddenly that not only were these nostalgic glimpses of my life at that age, but they were also the oldest digital photographs I have ever taken. I was taken by a desire to preserve these postage-stamp-sized, four-color-grayscale childhood memories.
Over the years, I've seen the Game Boy Camera pop up on places like Hackaday (don't miss the typo'd tag) enough that I knew that there was an active community using their Camera's and getting the photos onto the modern internet, but most of what I remembered used specialized products or involved interacting with the actual cartridge itself to retrieve the pictures.
I, being both frugal and lazy, didn't really want to buy something or deal with cart interfaces and ROM dumps. Though I never had one as a kid, I knew that Game Boy Printer existed and was compatible with the Camera. It allowed pictures to be printed on special thermal paper stickers. Surely, I thought, a handheld console printing protocol from the late 90's would be simple enough for me decode and "print" pictures to my computer. Without going back to read any of those other articles, I jumped right into researching the protocol.
Amazingly, my foolhardy leap almost immediately bore fruit. The Game Link Cable, which the Game Boy uses for external communication, is serial-based and pretty straightforward. The printer protocol itself has been reverse-engineered and is well-documented, even on Wikipedia. I soon came across a series of posts from Dhole which further explain the protocol and describe emulating a printer with an STM32-based development board. I had no STM32 but, with this explanation and code examples, I felt prepared to port the process over to a dev board I do have handy: an Arduino.
It only now occured to me that someone else may have the same ideas I had, and I finally made the fateful search: arduino game boy printer emulator
Immediately, I found the Arduino Gameboy Printer Emulator, an open-source and well-documented project that does just what I want: emulate the printer to transfer pictures to your computer. It had even been featured on Hackaday, which I would have seen had I bothered to look.
I also found even more information about the Game Boy Camera, its workings, and interesting uses for its old-school look. So the lesson here, kids, is don't get so deep in your own head that you don't just google for what you want.
With that knowledge in hand, I made a few failed attempts to connect to the Game Link port using only jumper wires, gave up, and ordered a proper cable.
Recovery
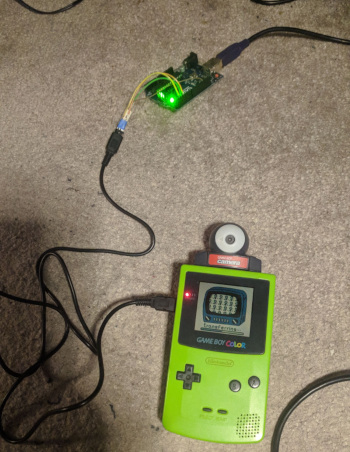
The steps to transfer Game Boy Camera pictures to my computer using the Arduino Gameboy Printer Emulator are actually pretty straightforward:
- Compile the Emulator sketch and upload it to the Arduino.
- Connect the Game Link cable to the correct ports on the Arduino. (Helpful pictures are on the GitHub)
- Use the print function on the Game Boy Camera to send the pictures to the Arduino, capturing the output from the Arduino serial monitor.
- Copy the serial output into the javascript-based decoder included with the Emulator project.
- Review and download the pictures.
The most straighforward way to connect the Game Link cable to the Arduino would be to cut the cable, separate and strip the individual wires, and connect them to the appropriate pins. I wasn't keen on cutting my brand new cable, though, so I tried out alternatives.
It took some trial and error, and talking to my partner for ideas, but I came up with a breakout using cardstock which I sized appropriately so that it can slide into the cable and make a connection. Carefully cut copper foil tape strips make up the actual electrical contacts, and I soldered some wires to the copper. It's a little delicate (strain-relief tape helps with that), but it turned out to work better than I expected and makes reliable contact with the connector pins.
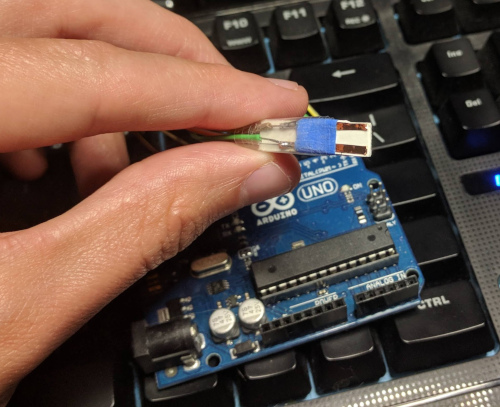
With that done, setting up the serial connection and using the Game Boy Camera's print function was pretty smooth. Though, I did have to swap the INPUT and OUTPUT ports compared to the emulator project's documentation. This is because I was using the full cable, not cutting it and tapping into the middle, and it turns out those pins actually swap between connectors (the cable does that because what's INPUT and OUTPUT depends on your perspective).
The webpage to decode the serial data worked well and was intuitive to use. You can even decode multiple images at a time if you've "printed" multiple of them. They are scaled 3x larger than the Game Boy native, though, and depending on the picture this can really affect the clarity. I just downscaled hard-to-see pictures after downloading to their original resolution (160x144) or 2x (320x288), which is easy enough.
Future Improvements
The Arduino Gameboy Printer Emulator is an awesome project and I'm so thankful to everyone who put in work on it. I have trouble thinking of any improvements, especially for the actual emulation aspects. I did find the process of using the javascript decoder a little clunky. It definitely makes sense if you want to review images before deciding what to download, but most often I've already reviewed pictures on the Game Boy and just want to get them onto my computer.
If I use this more, I'll make a small Python decoder that talks directly over serial and just spits out images as the emulator sends them. That way I can "print" a bunch of photos at once and let it run. I haven't seen anything like that yet, but as we now know, my googling skills are suspect.
My Game Link cable breakout also has room for improvement. Each time I plug it into the connector, I get a little more worried the adhesive on the coppor foil will fail and I'll have to rebuild it. A standard-thickness PCB would probably make a good enough connection and would be cheap to get a few manufactured. Though, if I'm designing a PCB, I might want the Arduino to be onboard so it's all one module...
Anyway, that kind of thinking is for the future.
